Monday, February 28, 2011

ShamRockin Craft Inspirations

Amazing St. Patrick's Party Ideas and Free Printables :
Remember to Click on the Links Highlighted in GREEN to View the Entire ShamRockin Craft Inspiration

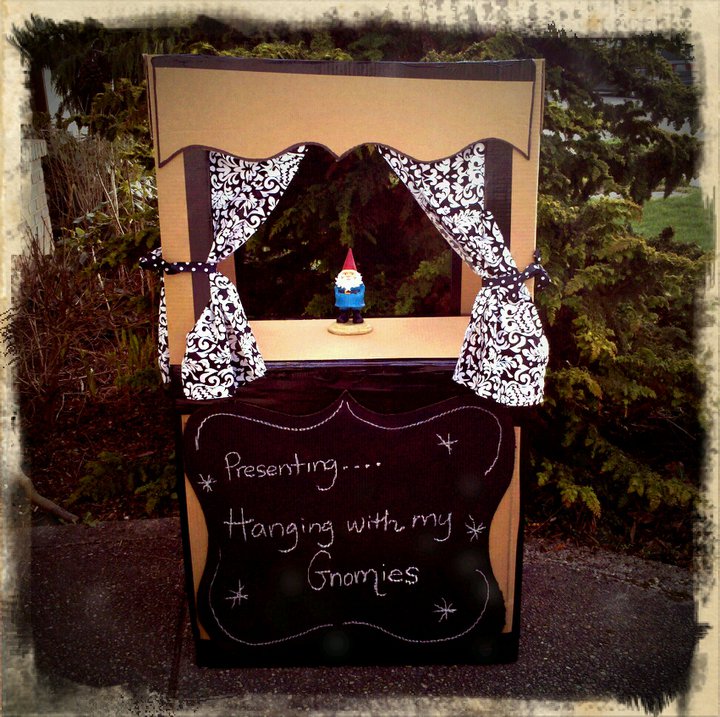
Frugal With a Flourish

Love, love, love this decor for the door.
Check out this amazing home decor site
{Frugal With A Flourish}

Bird's Party

Check out this amazing site and their St. Patrick's Day Inspired Party Ideas

{Funky Polkadot Giraffe}

Lucky Us! Itsy Belle is such an amazing site you need to check out her posh party styling.
{Itsy Belle} Site Click Here

Saturday, February 26, 2011

ShamRockin Irish Stache

A ShamRock' Good Time

These whimsical photo props are envouge and I couldn't resist making them of an upcoming St. Patricks Day Play Date that I will be styling.  Here is a sneak peek of my ShamRockin Irish Stache.   More St. Patricks Day Photo props coming soon.....


I made this ShamRockin Stache with in less than 10 minutes and under a dollar but all the pictures will be priceless


A Stache on a stick will bring a lot of joy to your St. Patricks Day where ever you are :)


Friday, February 25, 2011

Whimsical Rainbow Snowman


Whimsical Rainbow Snowman
There must have been some magic...
Our children are surrounded by the amazing world of technology! But there is still room in their world for the little magic through creative play and imagination.  This modernized snowman was created by rolling three classic snowballs then taking three separate water bottles filled with "neon food coloring" and coloring each one separately then assembling them together as a snowman.


<>                                         
We named him Snow Cone :) I have experimented with all kinds of colors and find that the McCormack neon food coloring that you find in the baking isle of the grocery store works the best!


We always build a snowman right outside our breakfast window in all three of our flower planters :) its fun to add color to a winters day.
  

Thursday, February 24, 2011

Snow Graffiti Prints

Add some magic to your snow day with these magical snow prints! Its simple, fun, and whimsical.  Just create a template from cardboard. I would recommend using a cereal box :)   I used a hobby knife to cut my designs. For quick designs you could use your cookie cutters as templates too. After you've cut out your designs just set them in the snow and spray with  colored water and let the magic unfold. 

Bring some magic to your snowday with these amazing snow prints!

Cut out a template from cardboard using a hobby knife.  Paper will roll when the spray bottle is added so it needs to be a heavy weight to withhold all the moisture.

Here is my field of snow covered Shamrocks!

Even my toddler was able to make the snow prints with ease.

Sure to bring a smile and magic to any ones snow day!

We were successful with all shapes and color combos!

Twinkle, Twinkle Little Stars...very magical just the way you are :)

The neighborhood loves this craft idea too and everyone was coloring snow before long.

He played with his snow prints for about 30 minutes

Look of pure joy to see his snow print!

My neighborhood peeps even created snow graffiti! Such an amazing morning!


Wednesday, February 23, 2011

Sham~Rockin' Damask Garland


Sham~Rockin Garland

Create this simple and easy St. Patrick's Day inspired Sham~Rockin' Garland

Supplies: Fabric, Freezer Wrap Paper, Card stock for Shamrock Patter, Twine, Clothes Pins, and Ribbon.

Shamrock Template
To make any shamrock just connect three heart shapes together.  Searching the web for Shamrock outlines will also give you lots of options too. Just print on card stock and cut it out and you have an instant template. On a side note, I would recommend using an hobby knife verses scissors just to make the job faster and more precious. 


To prepare your fabric for this project iron reverse side and then place the freezer paper shinny side down and iron on the highest setting.  The freezer paper will adhere to the back of the fabric and stabilize it for the project.  Then use your template and trace your shamrock and cut our your designs.  If the paper releases from the fabric no worries just iron again and it will re~adhere to the fabric.


The freezer paper helps stabilize the fabric for cutting out the design pending on the desired look of the project it can be left on the fabric or removed.

Love the overall look of this Sham~rock and the use of ribbon for the green elements of St. Patrick's Day.
Here is the end result of the Sham~rockin' project.  I love the use of twine and clothes pins because it reminds me of my childhood.  It's simple and could be added to as the holiday grows closer which is something that I love :) My overall vision is to add Vintage Irish Prints and Quotes.  This is what I have so far and can't wait to see how it transforms.


Love the black and white contrast this adds to my windows.
I added polka dot lime green and white ribbon to incorporate the St. Patricks theme.

To tie together my garland I added these decorative flowers to each end of my garland.

Tuesday, February 22, 2011

Vintage Valentines Soiree


Gifts from the Heart~                                      

Valentines Day 2011 could not have been any more adorable with this vintage inspired Valentines Day Party that I co~hosted and contributed to with  my dear friend Tiffany at Become ShopertunisticWith every creative play date or party I plan; I look around my world for creative inspiration and this Valentines Day was definitely inspired by the use of damask.  My first project for the party is putting together the party favors for my moms group.  I collected baby food jars and used extra fabric left over from previous crafts to decorate these heart~felt goodies.  I wanted to thank Living Locurto for her free Valentines Damask Printables. Materials used to create this entire craft were : *30 babyfood * 2 inch strips of fabric and scrapbook paper glued secured with hot glue* 30 cupcake printables that were cut to fit my lids just using basic computer paper and Elmer's glue.* 30 pieces of quarter inch fabric tied into a bow around the top of each lid.

Damask Valentine Photo Frame~


Once again I used the left over damask for this photo perfect frame for our play date Valentines Party with my moms group, South Sound Modern Mamas.  I wanted to create a prop for families to capture this special day at the park together.  I have a lot of photographer friends that were using a variation of hearts in their photographs and was inspired to make mine into a photo frame.  The best part of this project was getting to see all the adorable kiddos take pictures with the frame.  This was the most inexpensive item I made for the party and the most beloved.  The materials I used were as follows. * First I cut out a heart shape from cardboard then used it as a pattern to cut an additional shape.* Secondly I cut an additional heart shape to create a photo frame and used it again as a template to my additional heart shape. * I then glued the two heart shapes together using a hot glue gun.* Lastly I used four inch strips of damask fabric that I had left over from various other projects this Valentine Season and hot glued them around my heart shape to make the frame. On a side note this frame could be used again for weddings and other special occasions since love is a seasonal theme :)


Heart Hunt~


Heart Hunt

Bringing the unexpected, whimsy to any play date can be captured with a scavenger hunt even in the rain :) I found these plastic hearts in the dollar section at my local target and was inspired to use them as a "Heart Hunt" for our Valentines Party! I simply used a black sharpie to transform these simple hearts into couture conversation hearts and filled them with Valentine Kisses.  I then used simple brown lunch bags and transformed them into decorative bags.

Couture Heart Hunt Bags

Paper Heart and Damask Heart Clothes Line Decoration

Free Valentines Printable in Clear Photo Frame


Sunday, February 20, 2011

Garden Gnome Whismical Puppet Show

I have always loved the unspoken magic of a garden and this is the perfect project to bring that whimsy and magic of a garden indoors as we await the beginning of spring.  Here are some creative inspirations that got me started on my project.  This is a sneak picture peek of my, "Hanging with my Gnomies Playdate" I will post the DIY instructions for the Puppet Theatre soon.


DIY Cardboard Puppet Theatre

Every Gnome needs a home!


Pre~production Performances!

Adding our Gnomes for our Play date Production
Gnomie and Friends stick puppets and table decor

Bowling with my Gnomies Toddler Activity